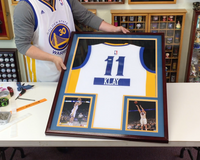
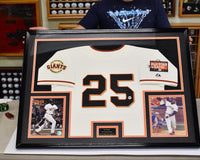
Have an autographed jersey or merchandise for a favorite football player that you want to showcase? Don’t leave your collectibles hanging in the closet or hidden away in a box – Proudly display them using a X-Large Double Matted Jersey Display Frame. These step-by-step instructions will help you achieve the look of a professional display at a fraction of the cost of traditional framing stores.
|
All you will need are a few simple tools: |
|
|
|
Estimated time: ~1 hour
1. Selecting Your Frame and Custom Matting
The product used in this tutorial is the X-Large Double Matted Jersey Display Frame. This frame comes with everything you need to achieve a DIY professional framing:
- Handcrafted, furniture-grade beech hardwood frame
- 98% UV protection, ultra-clear acrylic that will safeguard your jersey and photos from fading
- 4 frame color options: Black, Cherry, Walnut, and Oak wood finishes
- 3 background color options: Black, Red, and White felt
- Double matting that can be personalized to your team colors and layout of choice
- 20 matting colors
- 27+ matting layouts
In selecting the matting colors, take a look at your jersey and team colors, and select a top matting color and bottom/trim matting color. Typically, people will choose a color similar to the jersey color for the top matting color and a color similar to one of the jersey accent colors for the bottom/trim matting color.

In selecting the matting layout style, consider if you are adding an engraving plate and/or if you are adding photos (and if so, in portrait or landscape orientation). For football jerseys, because of the wide size and large sleeves, we typically recommend that you frame with the horizontal orientation layouts. This will also allow you to show off any patches or numbers on the sleeves.

For more inspiration, take a look at reviews for 100+ customer submitted photos.
2. Getting Ready
Before you begin framing, lay out your jersey on the background and test its placement with the custom matting. Center your jersey, leaving about two inches of space at the top and bottom for the matting. For a football jersey, you will want to fan out the sleeves. Any extra fabric at the bottom of the jersey can be folded and tucked under.
Note: Make sure the hanging hardware on the back of the frame is at the top!

3. Creating the Main Jersey Insert
The first thing you will need to prepare is the main insert for the jersey. This insert will give your jersey a stretched-out and wrinkle-free look. It will also help with securely pinning your jersey to the background.
Start off by taking measurements of your jersey with a tape measure. You will need the height and width of the jersey.
- For the width, measure the jersey under the sleeves. Note: You want the jersey to be nicely stretched out. To achieve this look, add about an inch to the width measurement.
- For the height, with your jersey in its approximate place on the background, measure from the top of the collar down to the edge of the background. (Extra fabric will be folded and tucked under.
Cut the 30”x42” mat board into a rectangle with your height and width measurements. This will be the rough outline of your main insert. Set aside the remainder of the mat board for your sleeve inserts later.
Place your jersey on top of your rectangular main insert cutout. Roughly mark where the shoulder of the sleeves slope down. Use a straightedge to trace out a line. Cut out this triangle with a pair of scissors.
Make reference of where the collar dips down and cut that section out of the main insert as well. The goal is for the mat board insert to be hidden.
Test fit your main insert.

4. Creating the Sleeve Inserts
For a football jersey, you will need two sleeve inserts. Fan out the sleeves to showcase any patches or details on the sleeves.
Start off by taking three measurements:
- (1) the width of the bottom rectangle of the sleeve
- (2) the overall height of the sleeve
- (3) the height of the bottom rectangle of the sleeve.
Trace out two of these shapes on the remaining mat board and cut them out.
Test fit your sleeve inserts.

5. Pinning the Jersey to the Backboard
Before securing the jersey down to the backboard. Take your tape measure and ensure that your jersey is centered all around.
Insert the straight pins through the mat board and into the background at about a 10 degree angle, facing into the jersey, toward the center. Use something hard to push the pins in if you are having difficulty, but this should not require too much force.
The first area you will want to secure is the collar. About three pins under the collar area should be enough.
Next, fold into the sleeve to reach the inside of the jersey. Pin the top edges of the main insert down with about three straight pins on each side.
Stretch out the jersey and tuck the excess fabric at the bottom under the mat board.
Secure the jersey down the sides and across the bottom, pinning through the mat board insert and into the background.
Place the sleeve inserts back in and use three straight pins across the bottom of the sleeves to secure each of these sections down. You can use a pin at each top corner of the sleeves to prevent them from bunching out.

6. Attaching Photos to the Matting
If you have a custom matting layout for photos or engraving plates, now is the time to secure those items to the double matting. With the double matting flipped upside down, position the photos/engraving plates and tape the edges with masking tape.
Optional: If you have extra mat board, you can cut out a piece as a backing for your photos/engraving plates to keep them even more secure and flat. Cut these backings a little larger than your photos. For example, if your photo is 8x10, cut a 9x11 backing.
7. Adding the Spacer (Optional)
This optional step will give your entire display a perfectly level, professional look. Cut some foam strips to line the underside of the top section of the double matting, or any other sections that sink down. Attach these foam strips with a few dabs of hot glue.
8. Sealing the Display Case
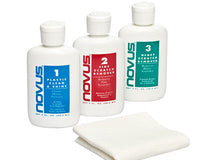
After a final cleaning off of any lingering debris or lint on the jersey and background, as well as a careful cleaning of the UV protection acrylic, the jersey frame is ready to be sealed.
Position the frame over the backboard and swivel in the tabs on the back. Flip the frame over tighten the tabs with a screwdriver. You can also seal off the back of the frame with masking tape. This will prevent the tabs from moving or perhaps scratching the wall when hung.
9. Final Product

And that is how you can frame a jersey yourself at home! For an affordable price and with a fun DIY project, you can proudly showcase your prized collectibles.
Make sure to view our video for a step-by-step walkthrough and subscribe to our channel for more related to how-to displays.
Check out the X-Large Double Matted Jersey Display Frame here!


